
Overview
 The electronics circuit design module will introduce the basic theory of electricity, circuit design, and circuit building by taking participants through the full manufacturing process of a printed circuit board. Participants will initially learn the physics and measurement skills needed to design and troubleshoot their circuit on a breadboard in a laboratory setting before learning assembly techniques such as soldering and crimping. Participants will then use that knowledge as they go through the entire Electronic Design Automation workflow in Autodesk EAGLE to build a printed circuit board that controls the speed and direction of a motor. By the end of the module, students will be able to design, prototype, and assemble printed circuit boards for their own projects.
This module covers:
- The basic theory of electrical circuit operation.
- How to use the electronic design automation (EDA) toolchain to design electrical circuits and printed circuit boards (PCBs).
- And processes for small batch circuit assembly.
Learning Outcomes:
By the end of this module, students will have demonstrated familiarity and ability in:
- Electrical, soldering, and lab safety practices
- Usage of Autodesk Eagle and Git
- General understanding of electrical theory, analysis techniques, components, and basic circuits
- Usage of multimeters and oscilloscopes
- Hands-on soldering techniques in both through-hole and surface-mount applications
- The EDA toolchain from part sourcing to final circuit design, manufacture, and assembly
- Learn processes and strategies for peer design review
- Application of tools for project management (engineering notebook)
Section 1:
A series of weekly labs relating to component behavior, circuit theory, and circuit analysis that introduces common circuits as well as the following tools for measurement and troubleshooting:
- Multimeters
- Oscilloscopes
- Circuit simulators
In these labs, multimeters will be used to examine discrete component behavior and characteristics. Oscilloscopes will come into play in analyzing the behavior of circuits over time. Circuit simulators will be used as a method of verification.
Section 2: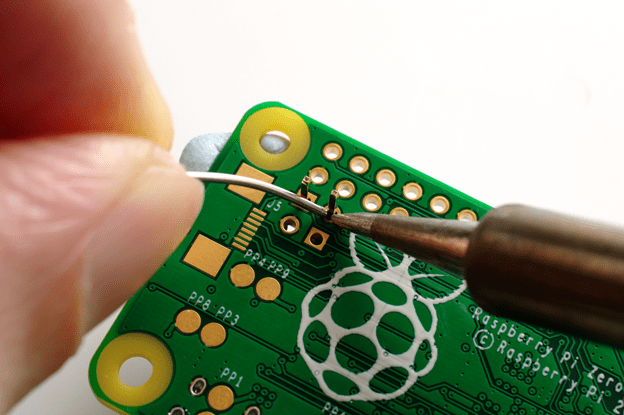
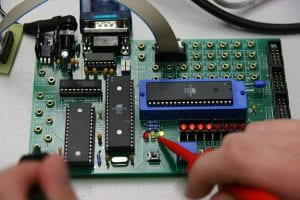
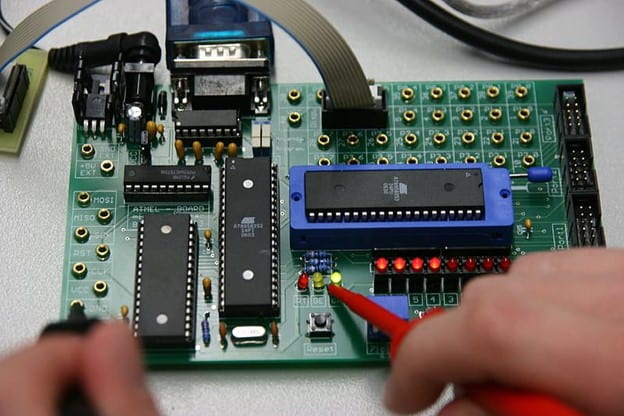
A series of weekly labs relating to circuit assembly and soldering on:
- Breadboards
- Perfboards
- Printed Circuit Boards (PCBs)
In these labs, you will assemble basic circuits and get hands-on experience soldering wires, perfboard circuits, and PCBs. Some tools that will be used in these labs include: soldering iron, heat gun, solder braid, and more.
Section 3:
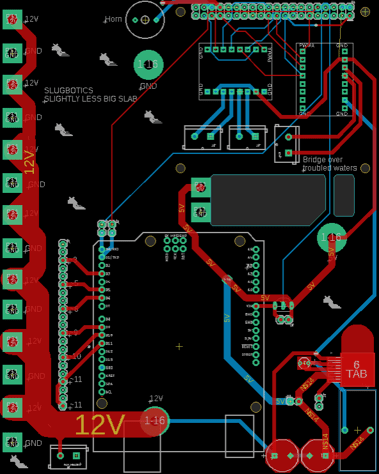
A series of weekly labs that work through the entire EDA toolchain using Autodesk EAGLE:
- Requirements / Bill of Materials
- Schematic
- Prototyping and Testing
- Board Layout
- Design Review
- Manufacturing and Assembly
- Verification
In these labs, you will learn the Autodesk Eagle toolset and use it to design circuits for providing a safe and stable voltage supply as well as efficiently controlling the speed and direction of a motor (H-bridge) .